Share article
How to make a simple ant nest
Introduction
When starting an ant colony, you most likely need a proper ant nest, especially for species with cocoons instead of naked pupa. These species require grip for the larvae to spin the cocoons which is sometimes not achieved in a simple test tube. Even for larger colonies, such a small nest could be more than sufficient.
A lot of ant species require proper humidity for the larvae to develop and the workers to stay hydrated. This nest works by using a “mesh tower” as hydration system, the water evaporates and makes a humidity gradient in the air for the ants to use for their eggs and larvae. Other nests work by directly watering the plaster, but this in a lot of cases mold over time, especially in plaster.
What will you need?

-
Screw on petri dish 71x37mm (we used), 60x35mm or other
-
Small petri dish for mesh tower 30x18mm (we used), 39x21mm, 49x21mm
-
Small petri dish for mesh tower, cheaper alternative This one is 36x16mm, but all empty plastic candle containers that aren’t too tall or wide are fine
-
Fine ant mesh Recommended to buy 30x30cm as its cheap
-
Tubing “L” connector Recommended to buy 6x6mm, we bought 50 pieces

-
Tubing for hydration Recommended to buy 6x8mm, we bought 1 meter
-
Standard tubing Buy whats needed for your species, 7x9mm for small, 12x14mm for medium and 16x18mm for larger species

- Some kind of substrate
Like reptile sand or coco peat, may help prevent ugly mold on the plaster

-
Silicone aquarium glue Some type of transparent non toxic glue to make it visible how full the mesh tower is
-
Plaster
See paragraph below for explanation
Type of Plaster
This one is a bit tricky, we used Knauf modelling plaster, but this is generally not recommended as it is more prone to mold. Luckily, this will be reduced by using substrate and a mesh tower for hydration. Gypsum-based plasters like Ultracal, Hydrocal, or Hydrostone are generally recommended due to their ability to retain moisture and reduced chance for mold.
Nest Sizing
Make sure to buy the correct size of nest for your species. Species like a large Myrmecia could definitely use the larger nest, maybe even two of them. But smaller like a small Lasius niger colony do not need such a big nest, especially not that high. Make sure if you buy a smaller container, that the dimensions of the mesh tower will still fit properly. Most ant species would rather have a smaller nest than too large.
Nest depth is another crucial factor to consider. Different species have varying preferences based on their size and natural nesting habits. Smaller species often thrive in shallower nests where they feel more secure and can easily manage their brood. In contrast, larger ants like Myrmecia or Camponotus require deeper chambers to move around comfortably. You should also consider their natural environment, species that typically nest under flat rocks, for example, often prefer broad, shallow spaces that mimic those crevices.
Step 1: Drill First Hole

First its time to drill the first hole. In total theres 3 holes that need to be made, I use a drill so I can easily get a perfect fit. The plastic is pretty thick, so make sure to be careful when drilling.

I begin with the small mesh tower, drill a small hole in the side of the tower. You can remove the lid, it is not needed. The hole needs to fit snugly with the small tubing for you to be able to put water inside.
Step 2: Bind Mesh

Now its time to put the mesh on the water tower, this is way easier than you would think. No glue needed! Just use a pan on medium heat, put a piece of baking paper inside to protect the pan from the plastic, then press the top of the petri dish against the mesh for about 5 to 10 seconds until a perfect seal has been created that doesn’t come loose. Make sure to not press too long, otherwise the plastic will melt too far down.

When you turn the baking paper around, you should be able to see the perfect seal. Great, you did it! Now remove the baking paper.

There is a lot of excess mesh, to remove this just use a pair of scissors. Sometimes though, this may damage the scissors, so use at your own risk. The mesh I used is pretty thin though, so it wasn’t a problem.
Step 3: Drill Second Hole

Now its time to cut the small hole for the hydration tube in the large petri dish, measure the exact position with the smaller petri dish inside and make a small scratch so you know where to drill.

An easy way to get the tubing inside, is to put the tubing inside all the way for about 10cm, then put on the dish and pull it back. This saves a lot of time with connecting the small petri dish.
Step 4: Applying Silicone Glue

This is something we thought of our selves, I don’t know how common this is, but a very large problem with the mesh towers is that you cannot see how full they are. Overflowing of the water may cause the brood to drown, and you never really know if the water is dried up or not. Applying aquarium silicone on the side of the tower fixes this, it makes it very easy to see how much water is inside. Make sure it doesnt come loose when pouring in the plaster.
Step 5: Final Tubing

Now its time to cut the tubing, make sure theres enough length left for the “L” connector to properly fit inside. The connector allows the user to hydrate the nest via the vertical opening.

Make sure to also now insert the large tubing, its easier to insert it now than later. It will make sure theres enough space for tubing.
Step 6: Sculpting Plaster Inside


The humidity part is now finally done, its time to make the plaster insides. We used a plaster, sand, water and food dye mix, but this is far from optimal. Its very hard to keep the food dyes mixed in, it separates like oil. Its only possible when making the plaster more thick than normal. This will still leech some of the color to the top when drying though. Its best to use some kind of natural, non toxic, plaster coloring powder. We mixed brown and yellow coloring.
You can also use coco peat instead of sand, or just use your creativity and do whatever you want! We also tried it with coco peat, but this will most likely dry out because there is only a mesh tower, not direct watering. Also, when using coco peat, make sure to also color the plaster very dark brown, we did not do this, but we think this would look way better.

First pour in as much plaster so the plaster is leveled as much with the smaller petri dish as possible, tap it a few times carefully without knocking off the smaller petri dish to level it out. Then either press in the sand already, or do the sides first and then press in the sand. Depends on how fast your plaster cures. Either way, brush some more plaster on the sides with a small paint brush, then press on more sand.
We wanted to make a picture of the dish with only plaster without sand applied, so we waited a bit too much before pressing in the sand, this is why ours did not really stick this time, so make sure to be as fast as possible! If this happens, just apply another thin coating of plaster and press in the sand again. Make sure to then use the same coloring.

As you can see, you can easily see through the side. This way, you can see exactly how much water is inside.
Step 7: Optional Accessories

Time for some accessories, there are a lot of things you can make to improve the nest. First thing is a foam mat, this reduces the amount of vibrations the ants will receive when for example opening and closing a door nearby. Vibrations can lead to stress and make the ants eat their eggs and larvae.

Another important thing is to make a nest cover, this can be anything from a playing card to aluminium foil. Just make sure it can’t let any light through. I folded aluminium foil 2 times, then pressed it onto the lid and cut off the sides.
Some Examples for Inspiration

A smaller petri dish as outworld.

Closeup of the nest with light shining inside.

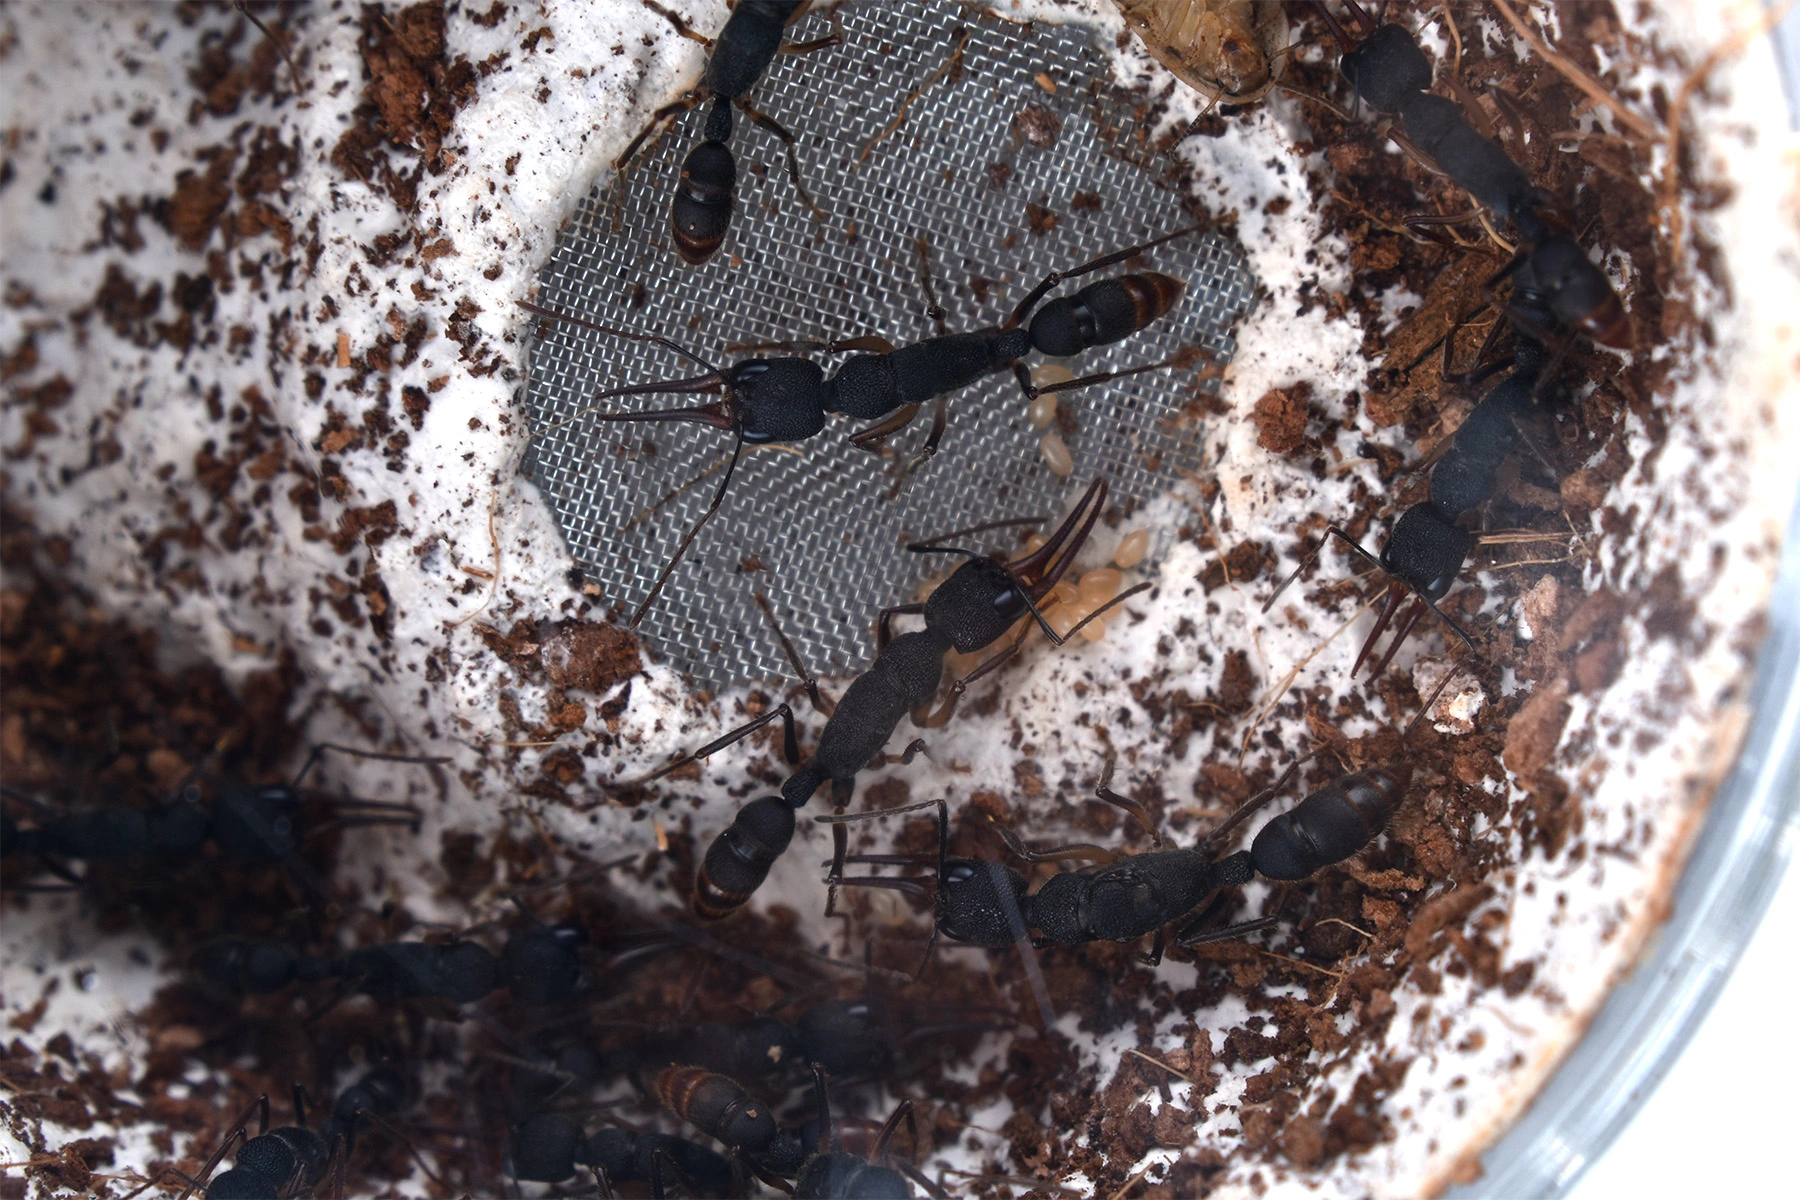
Harpegnathos venator in nest with cocopeat instead of sand, using natural powder form dark brown dye on the plaster would make it look a lot better.

Another view of the Harpegnathos venator colony.
Future Improvements & Ideas
One simple yet effective upgrade you can make to this design is expanding the water capacity. You could attach a separate container to the mesh tower,one that is shallow enough not to overflow into the nest area but wide enough to hold a significantly larger volume of water. This creates a larger reservoir, reducing the frequency of refilling while maintaining the same humidity gradient.
Conclusion
Building your own ant nest doesn’t have to be complicated or expensive. With just a few screw-top petri dishes, some mesh, and plaster, you can create a professional-looking formicarium that provides excellent visibility and hydration control. Whether you’re housing a small founding colony or a growing empire, this modular design allows you to adapt the size and depth to your specific species’ needs. Happy ant keeping!
Leave a Comment